Once your API settings are set, you need to enable Stripe payments on the frontend. Thus, you need to set up Credit/Debit Card Payments.
Credit Cards Settings
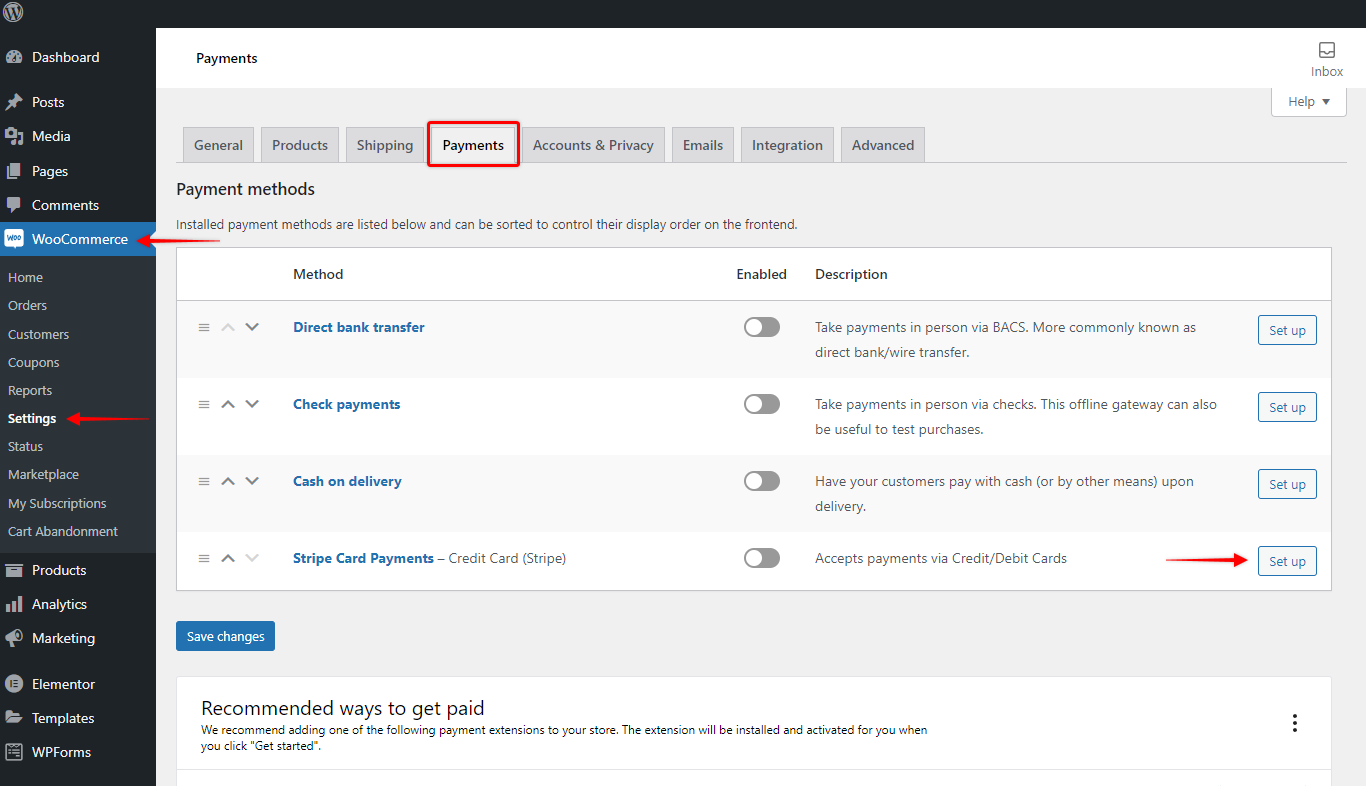
Step 1 – Navigate to Dashboard > WooCommerce > Settings > Payments;
Step 2 – Scroll down to Stripe Card Payments, click on Set up (or Manage);
Step 3 – Now, click on “Credit Cards”. Here, check the “Enable/Disable” checkbox, and add Title and Description;
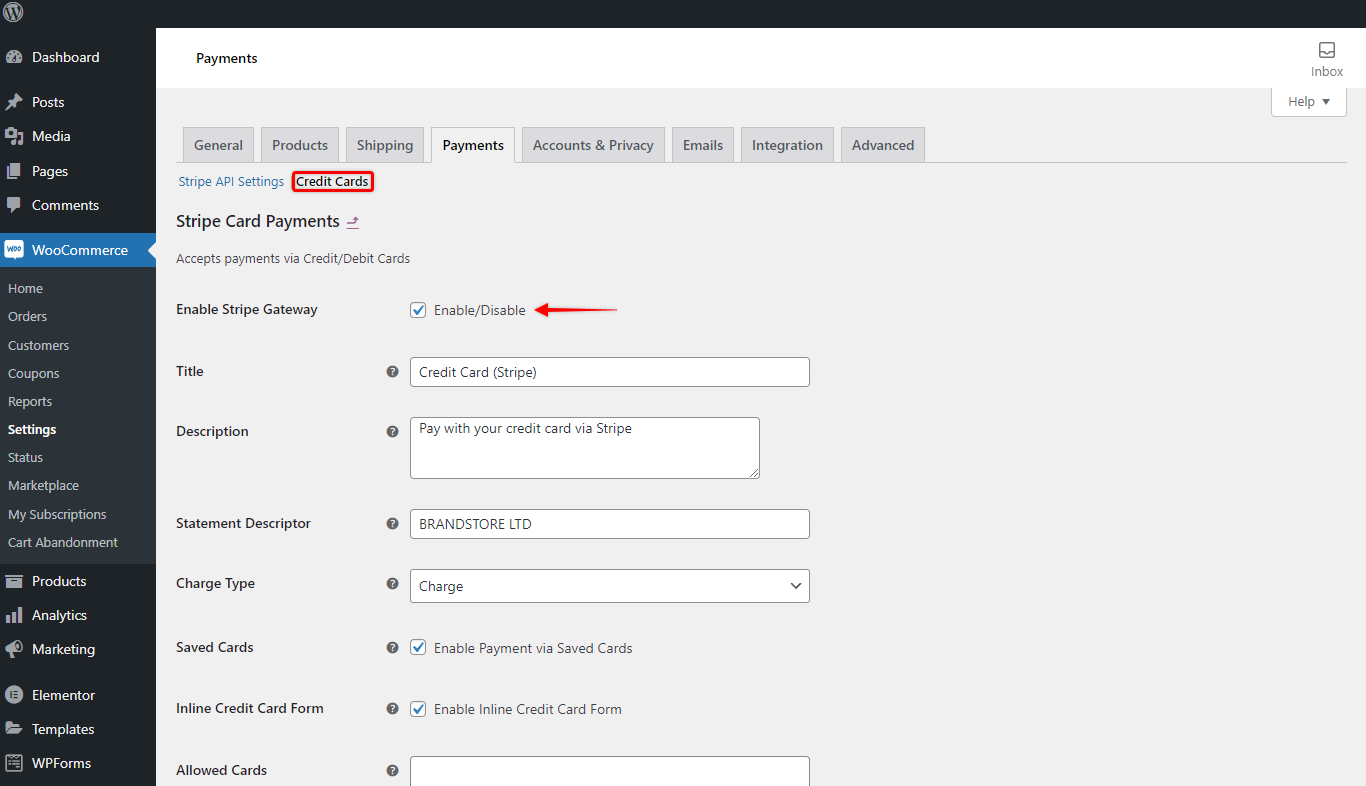
Step 4 – Next, add the Statement disruptor text. This is the text that will show on your customer’s statement;
NOTE: Statement descriptors are limited to 22 characters, cannot use the special characters >, <, “, \, *, /, (, ), {, }, and must not consist solely of numbers. This will appear on your customer’s statement in capital letters. (As per stripe’s rule)
Step 5 – Further, select the Charge Type you wish to apply to your store. Stripe supports two types of payment capture methods:
- Charge – charges clients immediately;
- Authorize – clients can approve each payment within a few days (maximum seven days) from their stripe account (webhook integration is required for this method);
As a result, the Stripe credit/debit card payments are visible on your store frontend. Also, you can set some additional settings:
Step 6 – Set rules for the user cards:
- Enable to save card details for future payments (Saved Cards);
- Choose cards you want to accept in your store (Allowed Cards). By default, the field will be empty which means that all Stripe-supported cards are accepted;
Step 7 – You can also set additional card payment form settings:
- Choose if you wish to use the Inline Credit Card Form;
- Edit your Order Button Label if needed.
Configure Webhook
When you select “Authorize” as Charge type, the user will have a few days to confirm the charge via Stripe. When that happens, Stripe needs to let your store know that the user authorized the charge. This is done using the webhook. Thus, you need to configure it.
First, we will need to set the test webhook for the testing. Let’s show you how to do it:
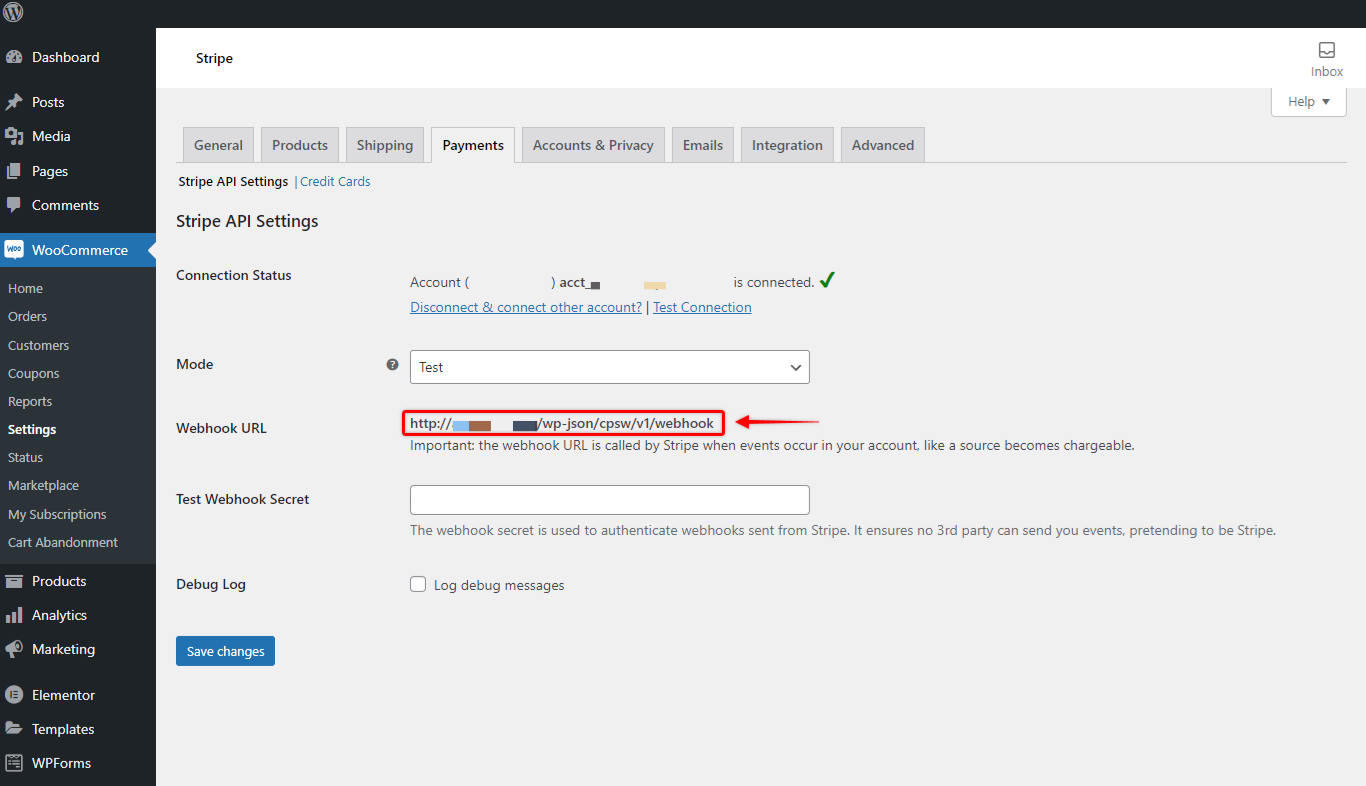
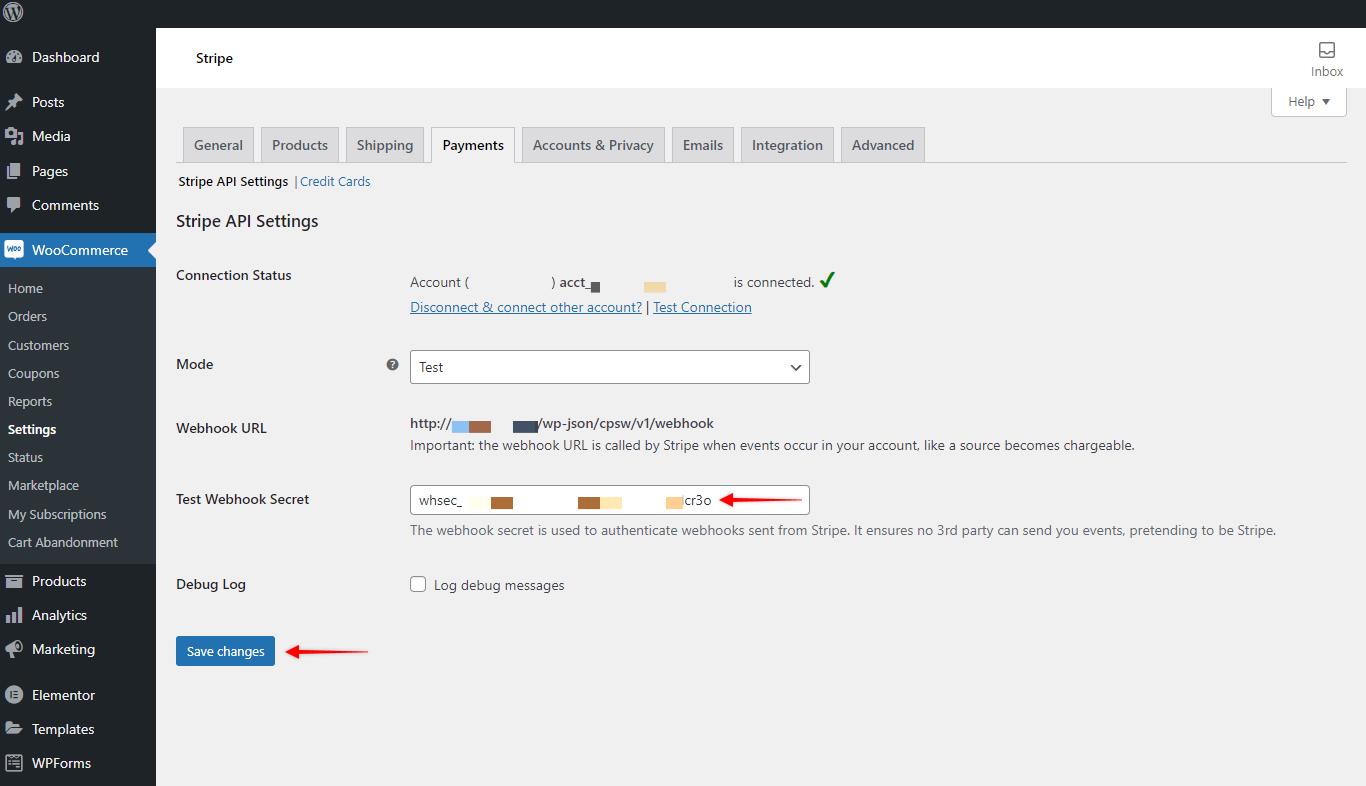
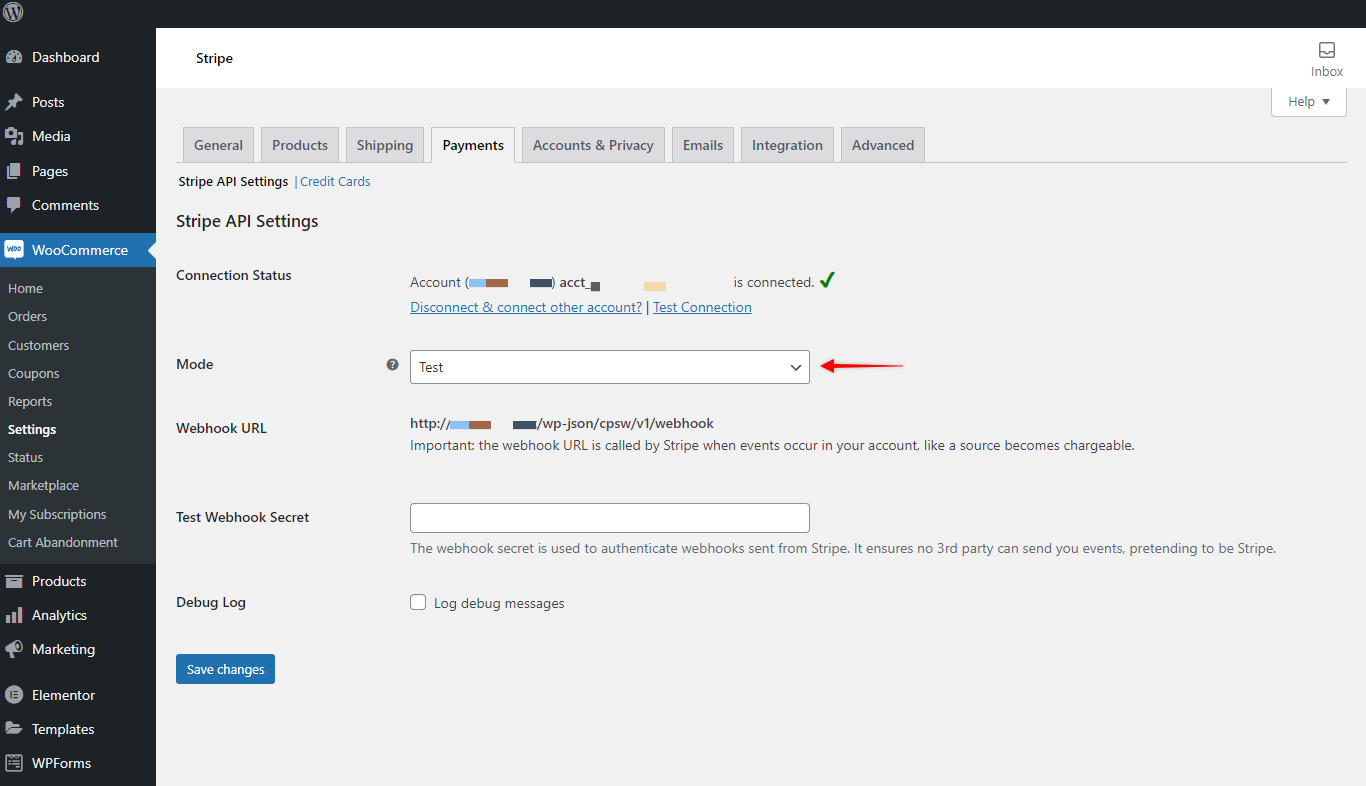
Step 1 – Navigate to Stripe API Settings (WooCommerce > Settings > Payments > Stripe Card Payment). Scroll down to Webhook URL and copy the URL you find there. Also, make sure that your Mode is still set to “Test”;
Step 2 – Login to your Stripe account and navigate to Dashboard > Developers > Webhooks. Turn on the Test mode, and click on the “Add an endpoint” button;
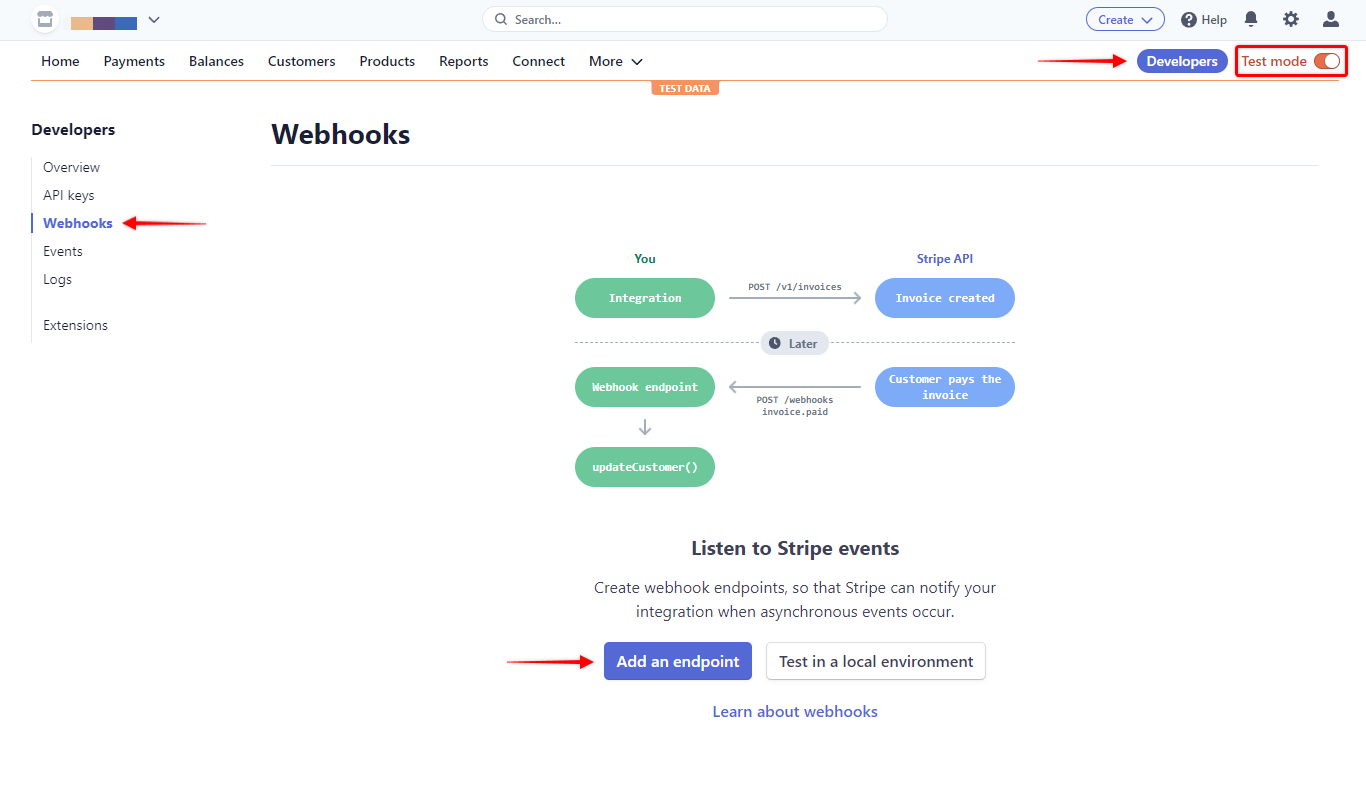
Step 3 – Next, you need to add the webhook URL (step 1) to the Endpoint URL field. Also, click on the “Select events” to add the events.
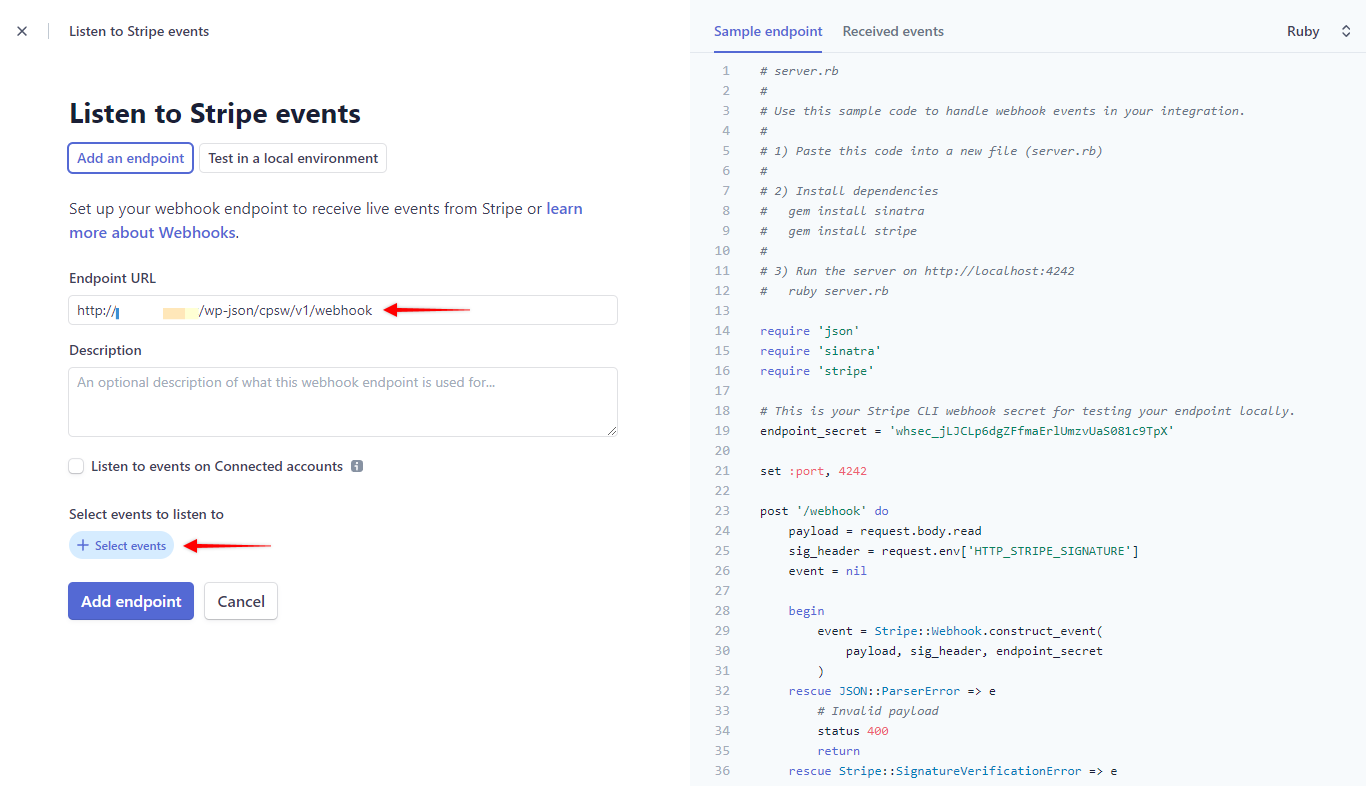
This is the list of the supported webhook events:
- charge.captured
- charge.refunded
- charge.dispute.created
- charge.dispute.closed
- payment_intent.succeeded
- payment_intent.amount_capturable_updated
- payment_intent.payment_failed
- review.opened
- review.closed
To add these, search for each term (for example “charge.captured”) and select it. Once you selected all the events, click on “Add endpoint” to create the webhook;
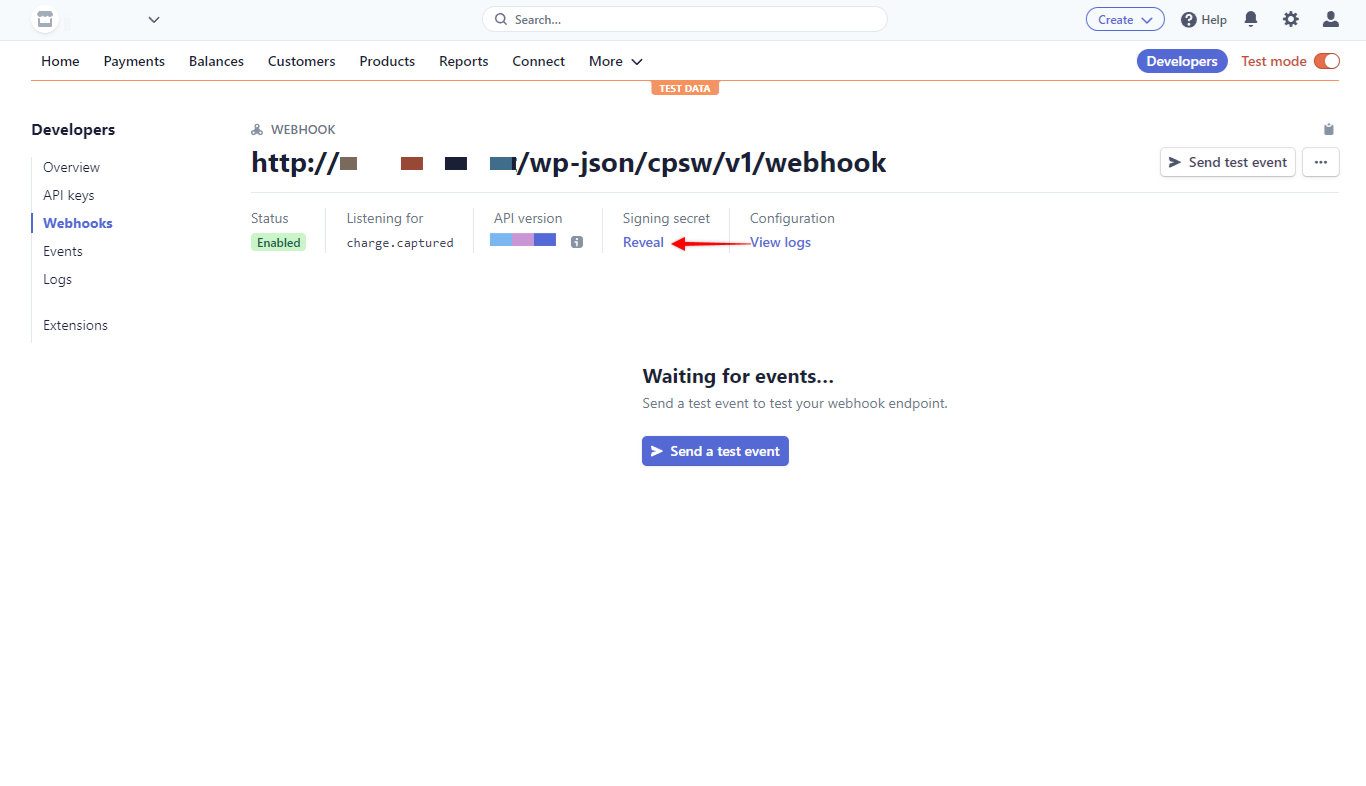
Step 4 – Now, you will see your newly created test webhook. In the Signing secret column, click on “Reveal” to see and copy the webhook secret;
Step 5 – Navigate back to the Stripe API Settings on your website and add the webhook secret to the appropriate field.
Well done. Your webhook is configured. Now, the only thing left is to test your payments.
After successful tests, you start accepting payments in live mode. For this, you will need to repeat the whole process to create the live webhook.
To create a live webhook, don’t turn on the Test mode in step 2. Next, once you get your live webhook secret (step 4), you need to add it to your website. Thus, in step 5, make sure your mode is switched to “Live” and paste the webhook secret.
NOTE: Once you switch to “Live” mode, the live webhook needs to use HTTPS.
Test Payments
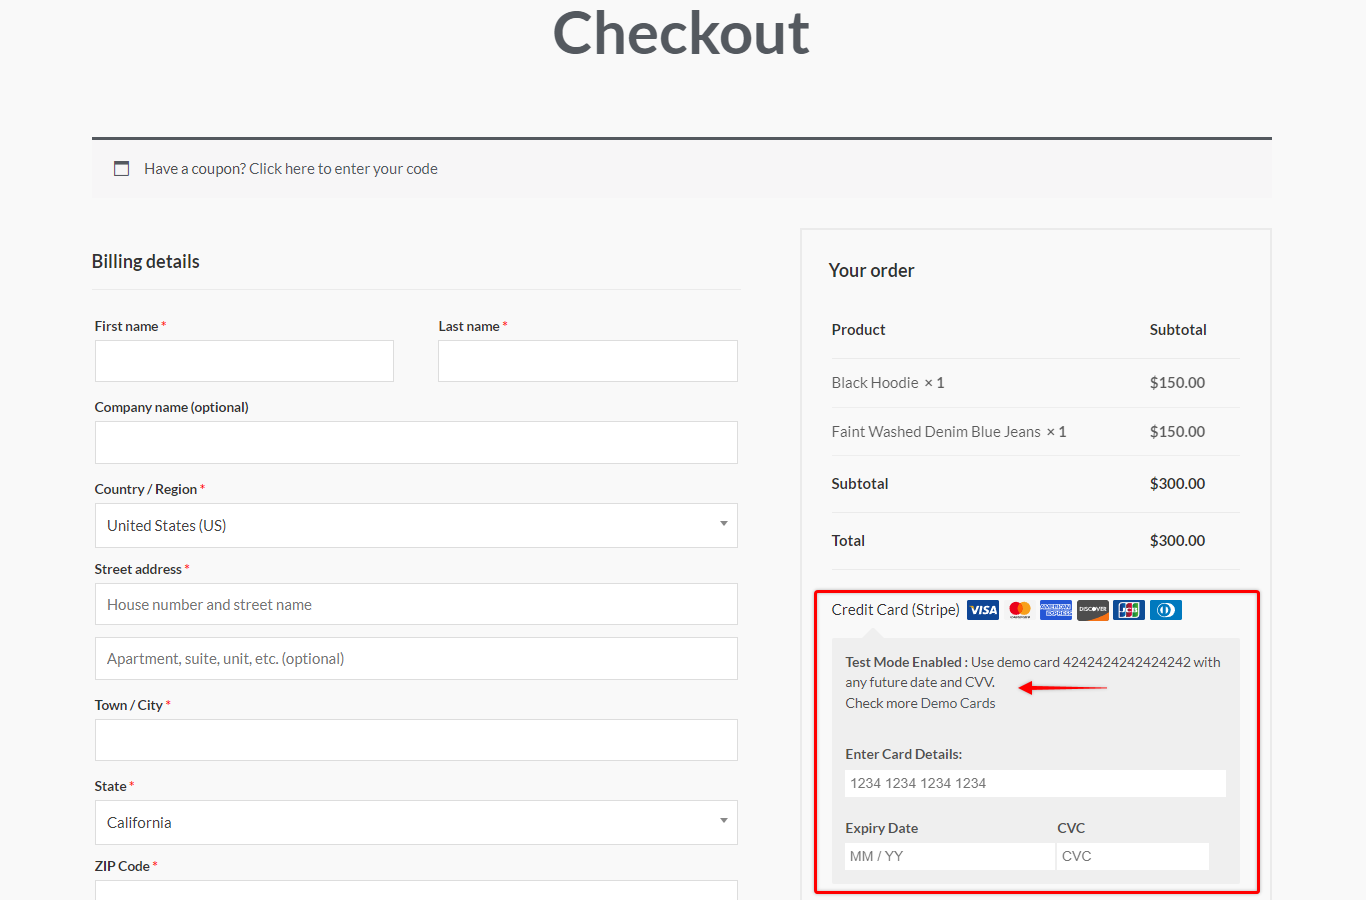
Finally, you need to test how Stripe payments work on your website. By default, your Stripe API Settings will have Mode set to “Test”.
That means that any test payments will not create actual money transactions. Instead, you can test your transactions using supplied demo cards:
Once you’ve set everything up and tested it properly, it’s time to switch to live mode. Navigate to Dashboard > WooCommerce > Settings > Payments.
Further, continue to Stripe Card Payments > Set up > Stripe API Settings and change Mode to “Live”.
Keep in mind that you need to have separate keys (test and live) added to Stripe for the WooCommerce plugin on your website.