Checkout Plugins – Stripe for WooCommerce comes with the feature that allows connecting your Stripe Account automatically. In case there is an issue with connecting Stripe with your online store, you can try to do this manually.
This document will show you how to do manually configure your Stripe API Settings.
Manage API Keys Manually
Checkout Plugins – Stripe for WooCommerce connects with your Stripe Account using Publishable and Secret keys. Thus, you’ll need to copy these keys from your Stripe account and add them to the plugin settings.
You can do it easily by following these steps:
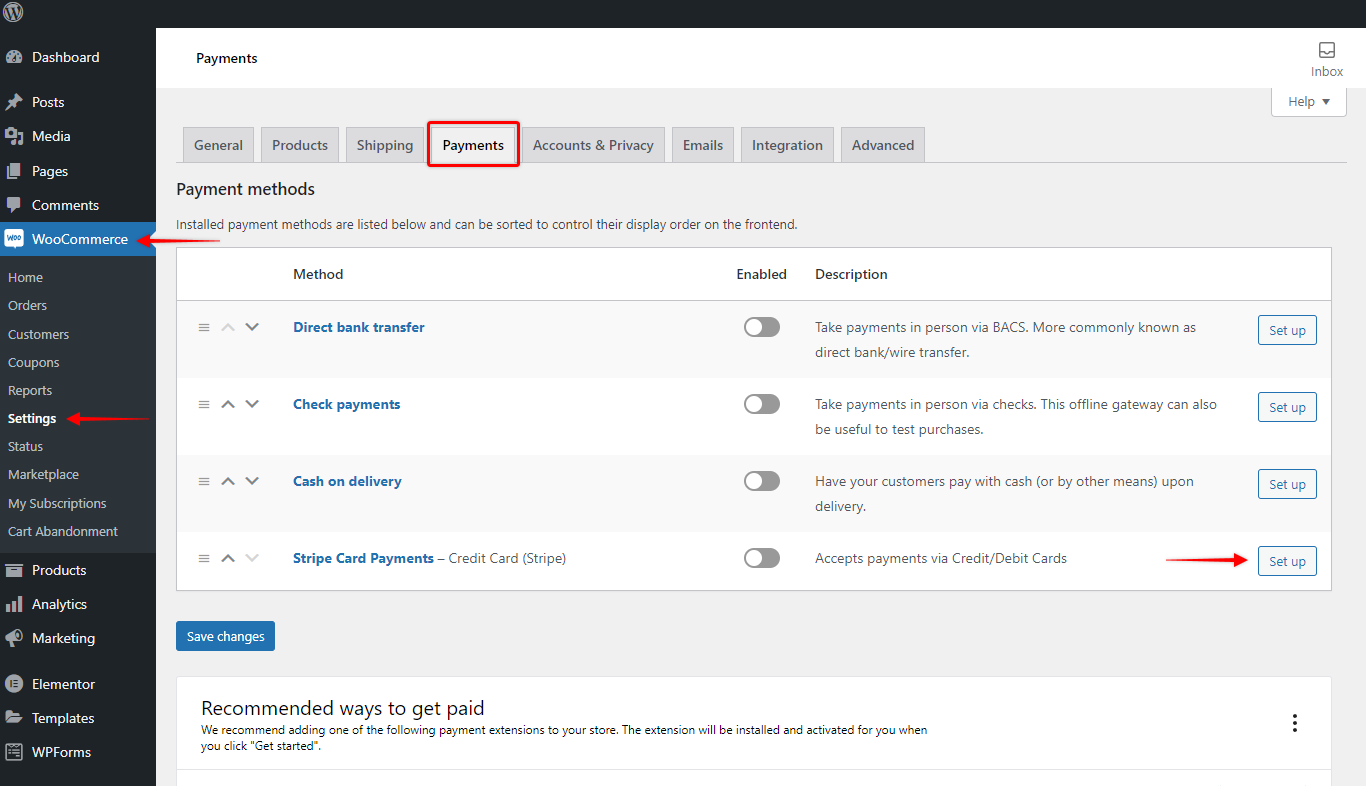
Step 1 – Navigate to Dashboard > WooCommerce > Settings > Payments. Find the “Stripe Card Payments” line and click on the “Set up” (or Manage) button;
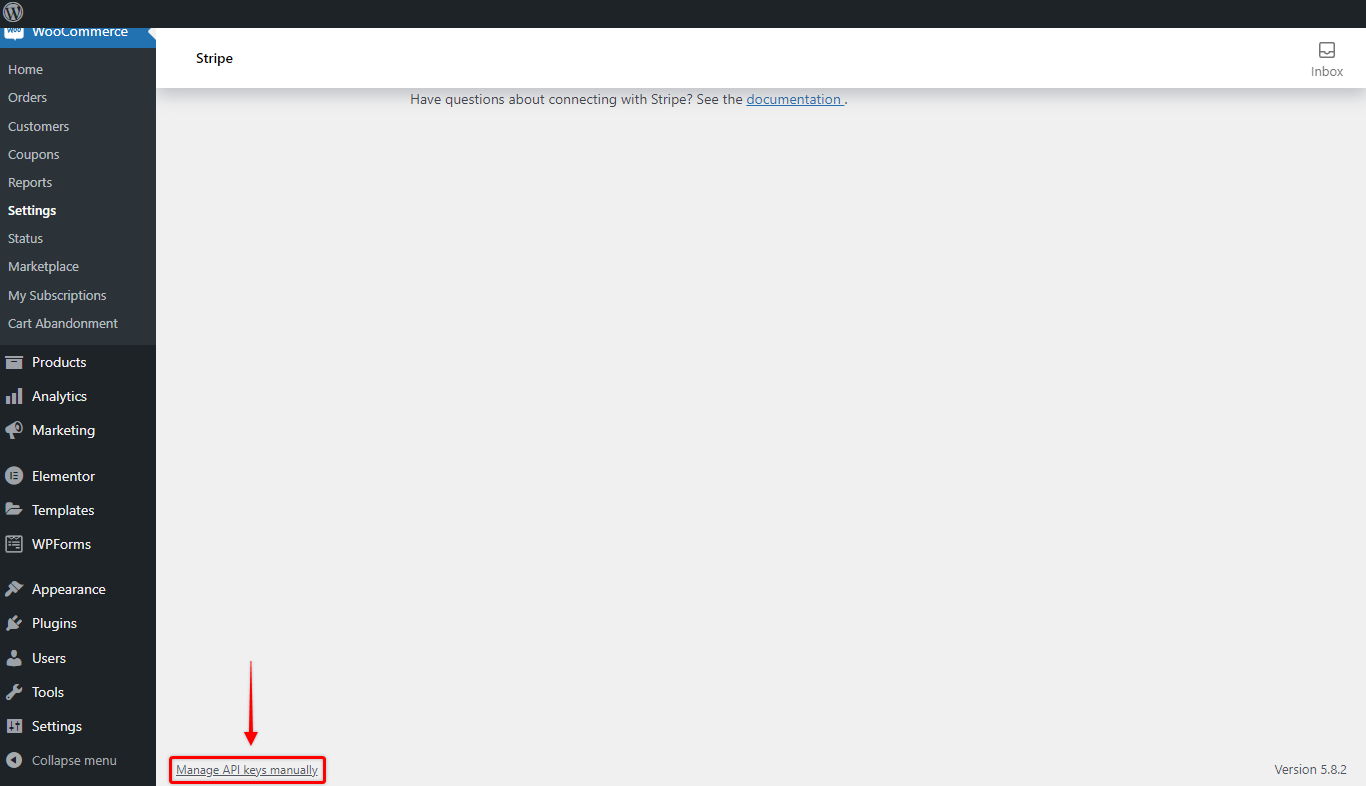
Step 2 – Here, click on “Stripe API Settings”. Scroll down to the bottom of the page, and click on “Manage API keys manually”. This will activate additional fields for adding test and live keys;
Get Stripe API Keys
Step 3 – Now, in a separate tab, log in to your Stripe account. Navigate to Stripe Dashboard > Developers > API keys;
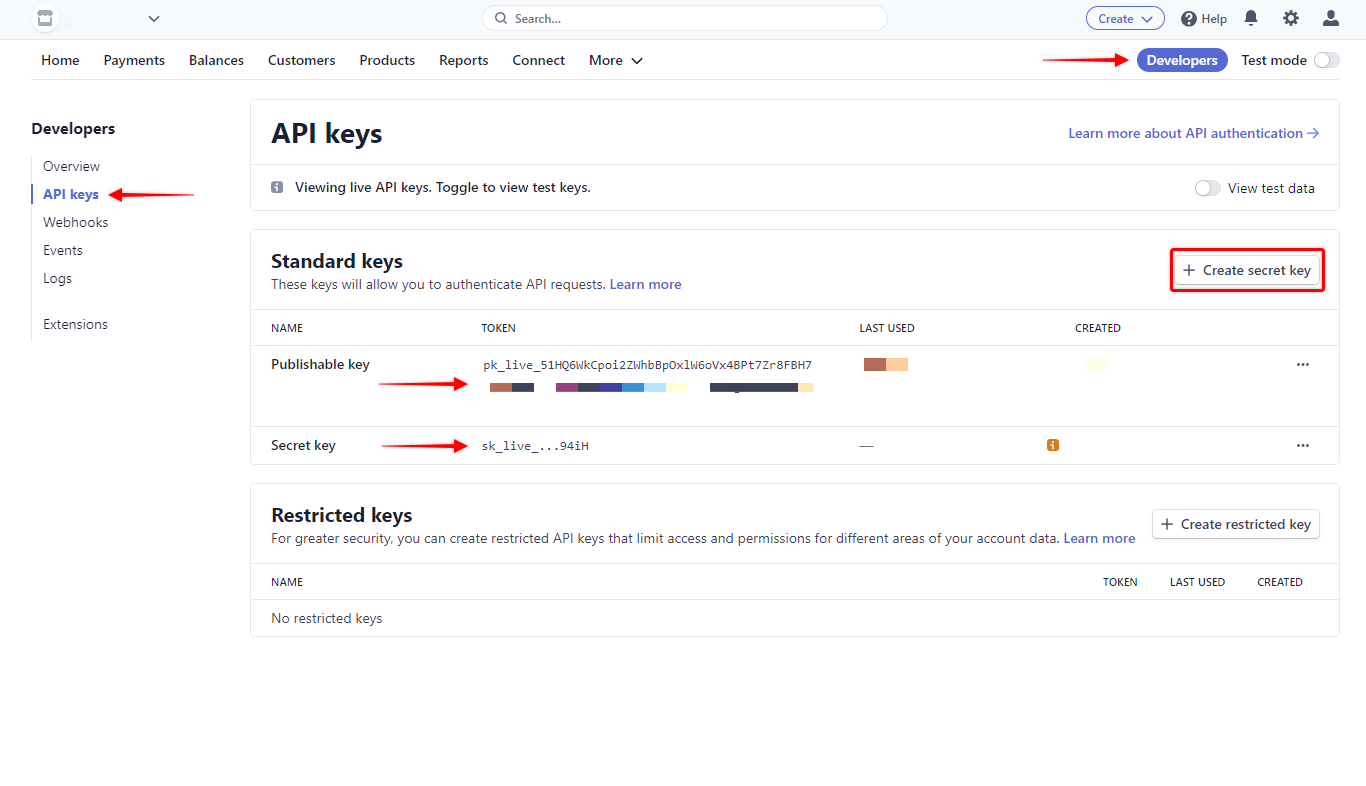
Step 4 – You will first see the live keys panel. The Publishable key will already be present. Click on “Create a secret key” to generate the secret key for your online store, if you don’t see it. Copy these to your website in the Live key fields;
Step 5 – Next, go back to the API keys page in your Stripe Dashboard, and enable the “View test data” option. Copy the Publishable and Secret Keys from this page to the Test key fields on your website;
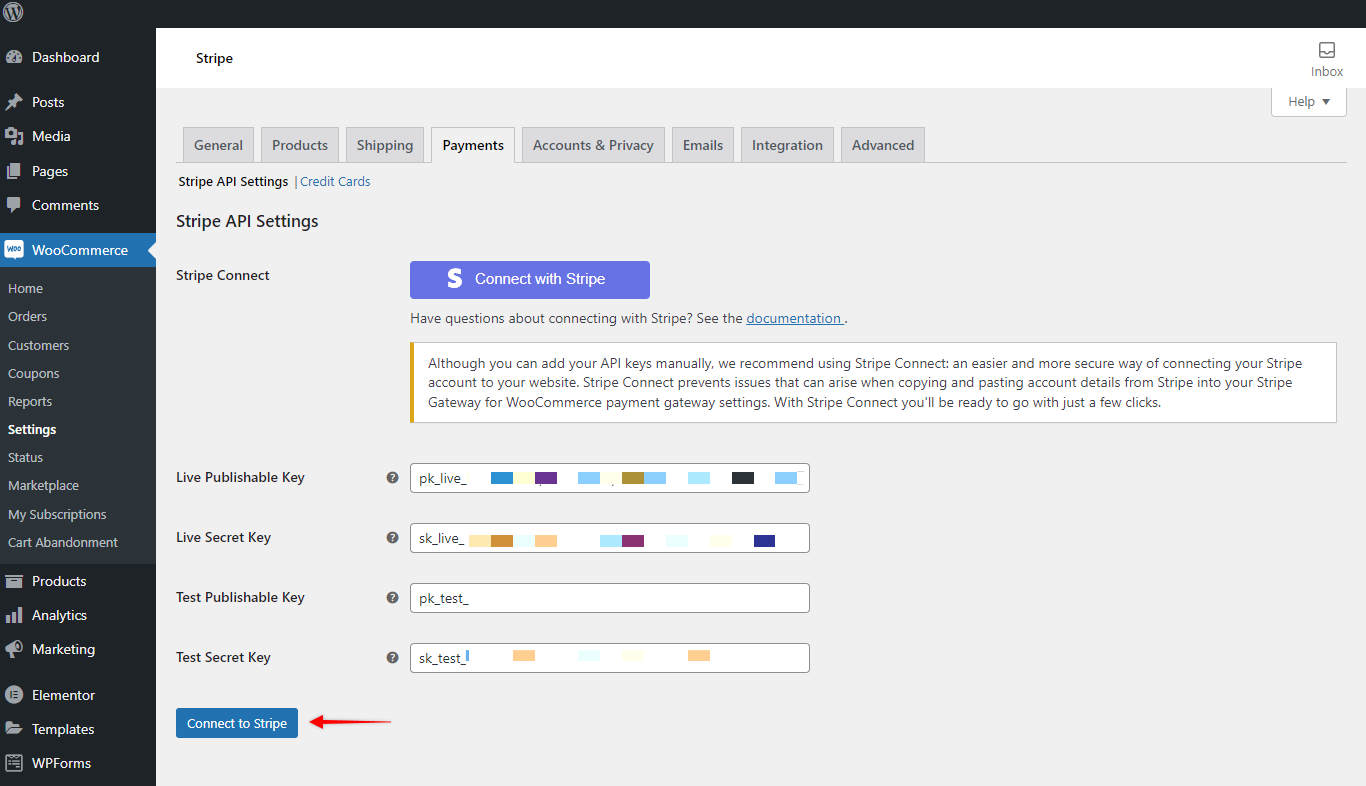
Step 6 – Finally, click the “Connect to Stripe” button to save the keys you added. You will see a “Your manually managed API keys are valid” notification if the connection is successful.
That’s it. Your Stripe account is connected to your online store.