Checkout Plugins – Stripe for WooCommerce plugin is an excellent solution for integrating your WooCommerce store with Stripe Payment Gateway. It will allow you to accept credit card payments instantaneously or authorize payment and charge it within seven days.
This document will help you set up Stripe for WooCommerce and integrate Stripe with your online store.
Setup
Checkout Plugins – Stripe for WooCommerce plugin is a free plugin available for download on the WordPress repository. You can install the plugin the usual way. Just follow these steps:
Step 1 – Login to your website and navigate to Dashboard > Plugins > Add New;
Step 2 – Here, search the WordPress repository for “Checkout Plugins – Stripe for WooCommerce”;
Step 3 – Click on the “Install” button. Once the installation is complete, click “Activate”.
Connect Stripe
Now that your plugin is installed, it’s time to connect it to your Stripe account. Let’s start with the recommended way of doing this:
Step 1 – Navigate to Dashboard > WooCommerce > Settings > Payments. Find the “Stripe Card Payments” line and click on the “Set up” button;
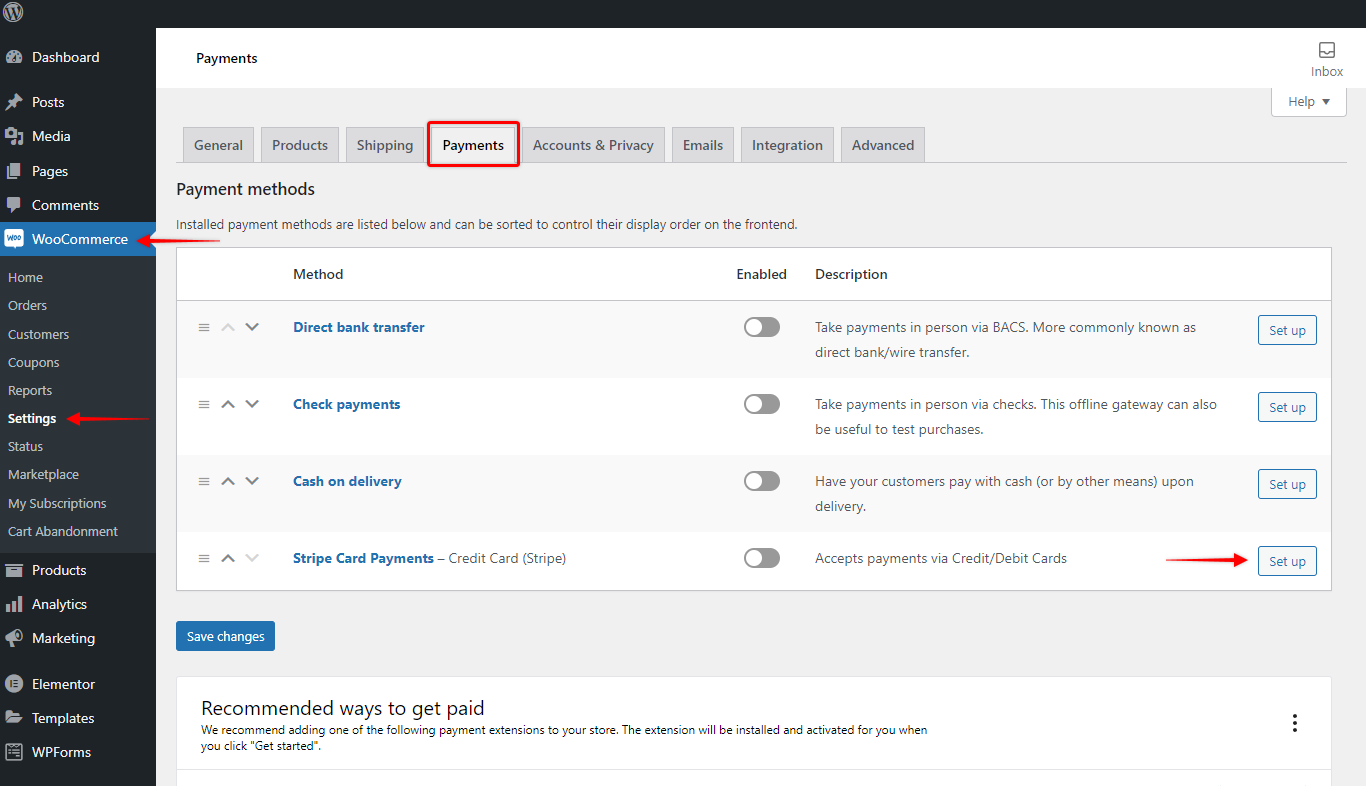
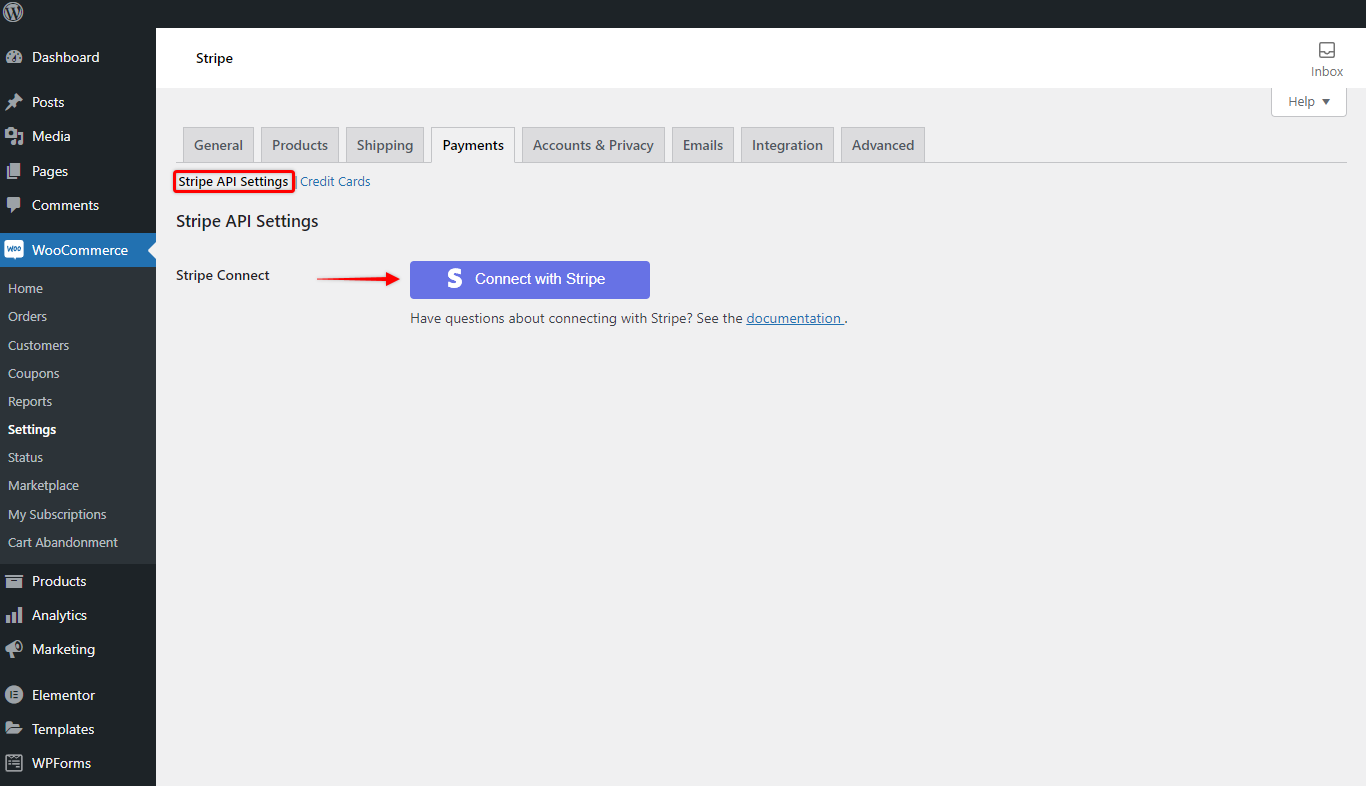
Step 2 – Here, click on “Stripe API Settings”. Under Stripe Connect, click on the “Connect with Stripe” button. This will transfer you to a Stripe account;
Step 3 – Login to your Stripe account. Next, select the account you wish to connect with your online store and click the “Connect” button;
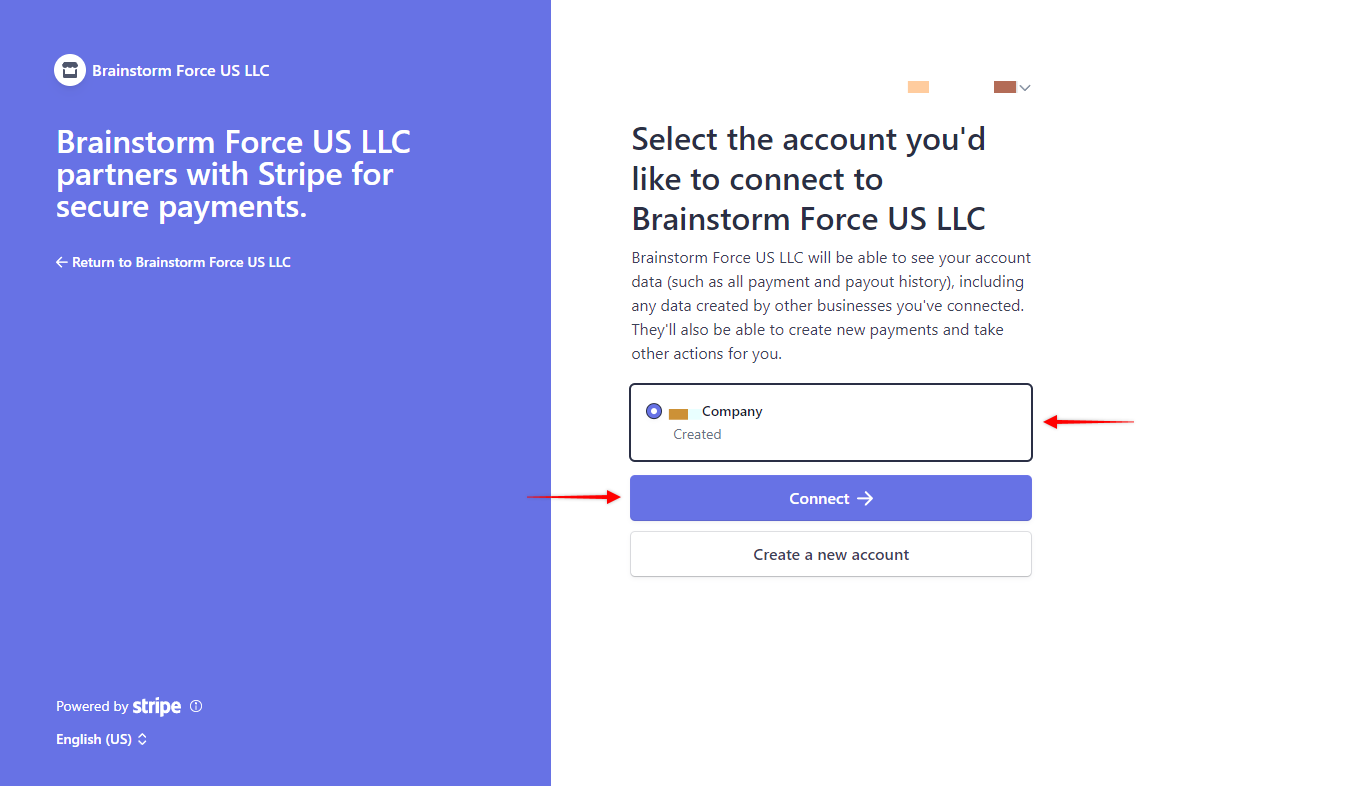
Your Stripe account is now connected.
Step 4 – You can test connections to make sure they are working well. To do this, click on the “Test connections” button.

If you’re having issues with connecting Stripe automatically, you can check out this article and try to do it manually.
Further, you can set up credit/debit card payments for your store frontend and test payments.