Once your API settings are set, you need to enable PayPal payments on the front end. Thus, you need to set up Credit/Debit Card Payments.
PayPal Settings
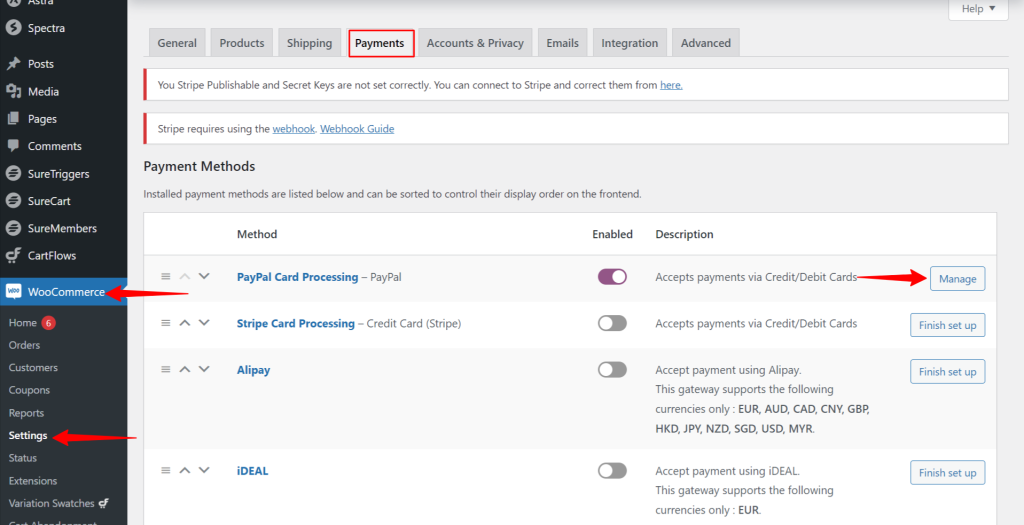
Step 1 – Navigate to Dashboard > WooCommerce > Settings > Payments;
Step 2 – Scroll down to PayPal Card Processing, click on Manage;

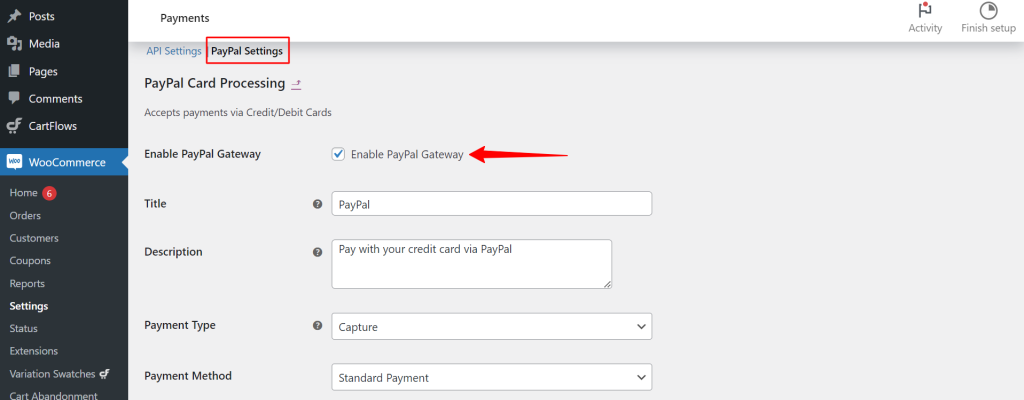
Step 3 – Now, click on “PayPal Settings”. Here, check the “Enable Payment Gateway” checkbox, and add Title and Description;

Step 4 – Further, select the Payment Type you wish to apply to your store. PayPal supports two types of payment methods: Capture and Authorized
- Capture – PayPal captures payment instantly
- Authorize – Can be captured late via PayPal dashboard. WooCommerce status updates through Webhook Integration
Step 5 – Select the Payment Method to either Standard Payment or Smart Payment and customize the Label for Order button.
- Standard Payment – Buyer will be redirected to PayPal’s payment page to make payment and will be redirected back to Sellers site.
- Smart Payment – The PayPal popup opens and buyers can do payments from the popup only given the feel of an integrated payment system. No redirect happens in this process.
Configure Webhook
PayPal Webhook Configuration happens automatically. Webhook gets created when the PayPal account connects successfully.
Test Payments
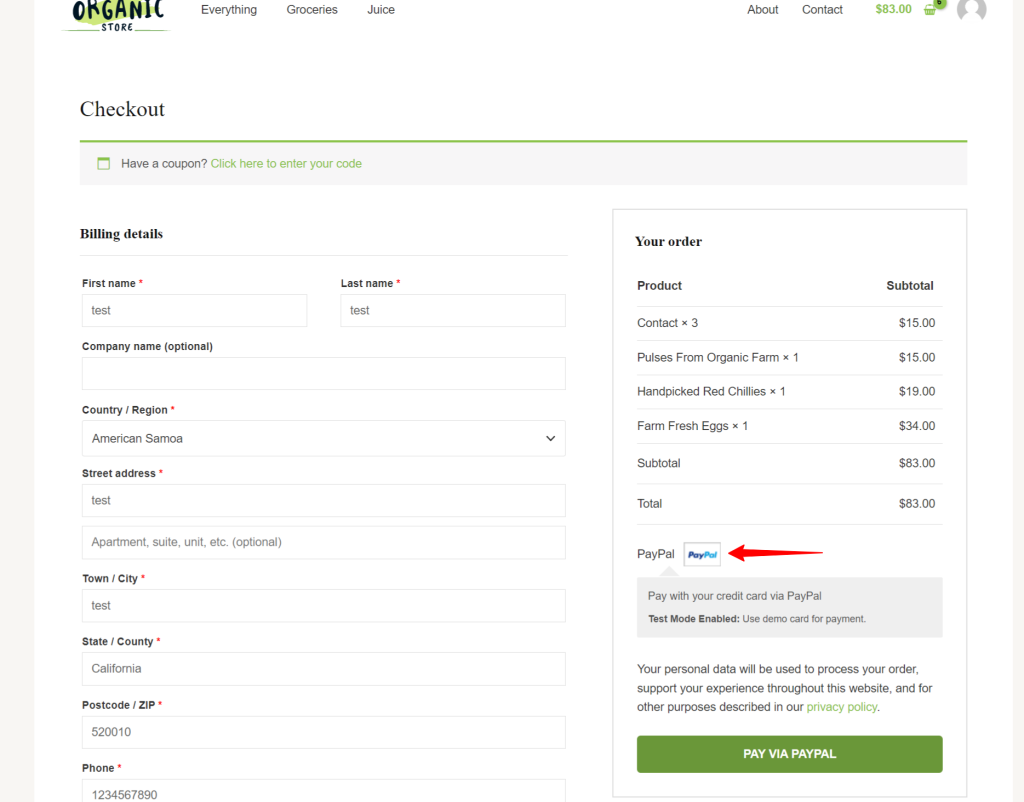
Finally, you need to test how PayPal payments work on your website. By default, your PayPal API Settings will have Mode set to “Sandbox”.
That means that any test payments will not create actual money transactions. Instead, you can test your transactions using supplied demo cards:

Once you’ve set everything up and tested it properly, it’s time to switch to live mode. Navigate to Dashboard > WooCommerce > Settings > Payments.
Further, continue to PayPal Card Processing > Manage > API Settings and change Mode to “Live”.